Showing posts with label chicken. Show all posts

Wednesday, October 19, 2011

Chicken Teriyaki And Sorry That Took So Long... :/

No matter how sophisticated we are about food, it's often the simplest things that make us collectively drool.

Browned and crisped chicken skin is one of those things.


And when that browned and crisped chicken skin is complemented by a delicate glaze of soy, ginger, onion, rice wine, and a touch of sweet, it's all the more irresistible, isn't it? And that is the magic of teriyaki chicken. Simply delicious and widely appealing, when it's done well, it takes a pretty picky omnivore to turn it down.

My preference is to grill it over a low flame, but on the day these pics were taken, some serious brewing was going down in the yard, and I didn't want to add to the mayhem. On days like that, or when I just don't feel like dealing with coals, I find the broiler an excellent workaround.

TERIYAKI CHICKEN
Serves 4

For the chicken:

- 2 pounds boneless, skin-on chicken thigh meat
- 1/4 cup lite soy sauce
- 2 or 3 cloves of garlic, crushed
- 1 Tablespoon rice wine, sake, or white wine
- 1 Tablespoon brown sugar
- 3 or 4 slices of fresh ginger (or if you don't have fresh, use 1/8 teaspoon powdered)

For the glaze:

- 1/4 cup lite soy sauce
- 2 or 3 slices fresh ginger
- 1 clove garlic, crushed
- 1/6 of an onion
- 1/4 cup rice wine, sake, or white wine
- 1 Tablespoons brown sugar
- 2 Tablespoons white sugar

- 1 teaspoon corn starch slurried (dissolved) in 1 Tablespoon cold water
- 1/4 cup unsalted chicken stock

1) Season the chicken with the marinade ingredients and mix gently but thoroughly to evenly incorporate. If you're planning to cook the chicken shortly, leave it out while you make your glaze. Otherwise, refrigerate until 30 minutes before you plan to cook it. I say it all the time, and I'll say it again that for the most part, most things cook better at room temp.


2) While the chicken is marinating, put all the glaze ingredients except the corn starch slurry and unsalted chicken stock in a small saucepan and bring to a very gentle boil over medium heat.


3) Once the glaze has come to a gentle boil (you should see gentle, infrequent bubbles rising to the surface and popping), add the cornstarch slurry and unsalted chicken stock, and bring back up to a very gentle boil over medium heat.


Once the glaze comes back up to a gentle boil, reduce the heat to low and let simmer for another 5 to 7 minutes, and cut the heat.


4) While the glaze is cooling, preheat the oven to 400F and place the chicken meat side down on a foil lined pan.


5) Roast the chicken for about 15 minutes in the 400F oven, then turn on the broiler, and place the chicken about 4 inches under the broiler to crisp up the skin another 2 minutes or so. After 1 minute, check the chicken every 15 seconds or so and take it out when it looks like this.


When you put anything sweet and fatty under the broiler, it can go from perfectly charred to burnt beyond recognition in a matter of seconds. Best to be vigilant! :)

Slice skin side down - and do it decisively so you cut through the skin - and serve with a little glaze spooned over.


On this particular day, we ate it with a little steamed white rice, some garden salad dressed with homemade Thousand Island, and a ham tamagoyaki (rolled omelette).


All together now...


Hope you rike. ^^

shinae

Sunday, July 31, 2011

Spicy Chicken Boolgohgi Kebabs For Beer Making Folk...

The Man used to work for a certain well known once-rogue craft brewery, and he still loves to brew beer at home regularly. So yesterday was a brew day for him, and now we've got two big jugs of Belgian Pale Ale bubbling and fermenting in our living room (it was a veritable Fermentation Fest up in here this weekend).

impromptu brewers' dinner

Because brewing a crapton of beer is an all-day and usually outdoor affair, it can easily turn into a little bit of a shindig. And when you've got friends coming over to help you lift big, heavy, lobsterpot-like mash tuns and boil kettles, you certainly can't let them go hungry.

But it's also one of those somewhat regular and casual things that isn't quite like a party for which you plan menus and such. So you dig deep into the fridge and pantry to see what odds and ends you can feed a few hungry guys who are drinkin' beer while makin' beer and their significant others who come bearing potlucky type things later in the afternoon. And you try to space them far enough apart so no one thinks about how the food you're serving them doesn't match because you assume everyone gives as big a crap about the food you're serving as you do.

Let's see... There were corn tortillas and blended pico de gallo fixins, so fresh chips (fried in oil with a little dab of bacon grease) and salsa were put out.


And when the chips ran out there were figs, a small chunk of the Man's homecured brown sugar bacon from last week, a little baby chunk of Parmiggiano and some honey, hence Figs Two Ways:


And then for dinner, since you bought a tray of chicken thighs earlier in the day during your weekly grocery run so they're the only unfrozen protein in the fridge other than the catfish you also bought (the pork bones were placed in the freezer), you make spicy dahk (chicken) boolgohgi aka boolgogi aka bulgogi kebabs because no one doesn't love the flavor of boolgohgi and because kebabs seem to magically make more food out of less meat.

That, some perennially crowd-pleasing crunchy soy slaw augmented with some fish kebabs fashioned from the cod and veg provided by one (pescavegetarian) guest, some pork chops provided by another, a 12-pack of Sierra Nevada Pale Ale and some other beer odds and ends and !Voila!

Impromptu Brewers' Dinner.

Dahk (chicken) boolgohgi (BOOHLgohgee) is usually made spicy whereas the beef kind isn't. But the base of the marinade is quite similar. I like to use thigh meat because the texture, flavor and fat content holds up better to the marinade than breast meat. This recipe is specifically for kebabs, but you could certainly use whole pieces of boneless thigh meat or even the entire thigh if you like, and cooking times will differ.

Generally speaking, I'm not a big advocate of overnight marinating. There are very few proteins that won't cure (essentially turn into ham is the way I like to think of it) under the saltiness of most marinades if left to sit in them overnight. The marinating point of diminishing returns is even earlier on meat that's cut kebab-size (1" to 1.5" cubes). Ideally, I would let this marinate for 45 minutes to an hour, and no more than two hours.

SPICY KOREAN CHICKEN BOOLGOHGI KEBABS
Makes about 12 kebabs
Serves 4-ish

- 12 to 15 bamboo skewers soaked in water for at least an hour before they go on the grill

- 2 to 2.5 pounds boneless, skinless chicken thighs cut into roughly 1.5-inch *cubes* (to the extent that you can cut chicken thigh meat into cubes, which is to say not really)

If you can't find the boneless, skinless meat, just get a roughly 3.5 pound tray of chicken thighs, remove the skin and trim the meat off as close to the bone as possible. I did, and made my weekly chicken stock from the scraps (only I left a little extra meat around the bone to feed Honeydew).

- 2 Tablespoons minced garlic (about 3 cloves)
- 1 teaspoon minced fresh ginger root (or you could use about 1/4 teaspoon dry ginger powder)
- 1 green onion, finely chopped
- 1/8 cup sugar
- 1/8 cup gochoojahng (Korean red chili paste) aka gochujang (you can substitute with sriracha - not quite the same, but you'll get a tasty result)
- 1/8 cup low sodium soy sauce
- 1 teaspoon kosher salt
- 1.5 Tablespoons neutral oil (like vegetable, canola, grapeseed)

- 1 large onion, cut into 1" pieces for skewering and tossed with 2 teaspoonfuls of oil

1) In a large mixing bowl, mix together all the ingredients except the onion, making sure to incorporate all of them thoroughly.


2) Cover the bowl and set in the fridge to marinate (about 1 hour ideally, and not more than 2). Remember to take the meat out of the fridge about 30 minutes before you're ready to grill.

If you're using a charcoal grill, start your coals about 20 to 25 minutes before you want to grill. You want a gentle, medium low heat over which to cook these kebabs.

If gas, just pre-heat your grill to medium low 5 to 7 minutes before cooking.

3) Skewer your kebabs so they look like this:


6 single layers of onion with 5 roughly 1" layers of chicken skewered between them. As you've probably discovered by now, it's a little challenging to get 1" cubes of meat from chicken thighs, but you generally want a 1" thickness of meat between veg, so you might have to add odd pieces of chicken to the bigger ones to achieve this thickness.

I used only onions primarily because I think it tastes simple and delicious this way. I don't think other traditional kebab vegetables go as well with this recipe. Plus there was soy slaw on the side, which complemented the kebabs quite nicely.

Everyone seems to *LOVE* this slaw.

4) Over a medium low grill, cook the kebabs  about 15 minutes, covered, turning them every 5 minutes.


They should look like this close up:


A little spicy, slightly sweet yet savory and super tasty with some plain steamed rice (I still can't seem to keep most white folk from dousing their steamed rice with soy sauce. :/) and a bite of that slaw.

This marinade, by the way, also works for dwaeji boolgohgi, which is spicy Korean style pork BBQ, and is especially delicious when made with thinly sliced pork belly. I often leave the ginger out when I make that, though.

A spicy/salty/sweet combo that's always a huge hit, and too easy not to try, really. :)

shinae

P.S. Here's the chicken stock:

Before china cap but after I removed the
meaty bones for Honeydew...

after china cap :)

Tuesday, July 19, 2011

Tea (And Chicken) For Two...

...and two more.

When efficiency dictates your cooking choices, creating rather than following recipes becomes the order of the day.

It's not because I'm not educated or inspired by other people's recipes - I find that reading both good and bad recipes helps me refine my food ideas. But it's more that my budget as well as the shelves in my new teeny, tiny kitchen can get rather unwieldy when you start buying a bag of this seasoning, a jar of that spice, a bunch of these greens, or a pound of that fruit in order to conform to a recipe.

Tea & Soy Sauce Braised Chicken...

So I read recipes and other food articles and eat out from time to time, not only to keep current, but to inform my palate as to what flavors and textures pulled from existing supply might make delicious sense when pulled together.

I've mentioned before that I'm not much of a purist in the kitchen, but on the other hand, my ideas of fusion are fairly tame and more borne of adaptation and necessity than driven by a desire to push the culinary envelope, so to speak. When I think about it that way, I don't really do fusion as much as makedusion, but so long as the results taste good, it doesn't really matter to me what I call it.

This Tea & Soy Sauce Braised Chicken is a great dish for a weeknight meal or casual dinner party with its budget- and palate-friendly but subtly complex flavor profile; a short, easily subbed and somewhat fused ingredient list; and a beautiful presentation with little fuss.

TEA & SOY SAUCE BRAISED CHICKEN
Serves 4

This recipe goes from stovetop to oven, so you'll need either a large ovensafe pot or pan to go directly into the oven from the stove, or a pot/pan in which to sear and braise the chicken, and an oven safe dish in which to broil the skin.

You could go without the broiling step, and the dish will still be delicious, but you'll miss out on that beautifully crisped and slightly charred chicken skin that I love so well (too much, maybe).


- 2.5 pounds bone-in, skin-on chicken
- 1 teaspoons kosher salt
- 1 teaspoon black pepper
- 2 Tablespoons oil

- 1 inch segment of ginger root, sliced into 1/8" discs
- 1/2 large onion (brown or white), cut into 1/4" slices
- 4 or 5 cloves garlic, crushed
- 1 Tablespoon non-flavored tea (I used oolong, but you could use green or black varieties)
- 1+1/4 cup water
- 1/8 cup Chinkiang or balsamic vinegar
- 1/4 cup soy sauce
- 3 Tablespoons packed brown sugar


- 1 green onion, julienned (or cut in thin strips) and julienned ginger for garnish (and when I say *garnish*, I always also mean *flavor* - I am unnaturally perturbed by the idea of irrelevant and non-integral garnish.)


1) Season the chicken on both sides with the salt and pepper.


2) In a large pot/pan (this one's a 13" saute), bring the 2 Tablespoons of oil to medium high heat and brown and sear the chicken, about 3 minutes per side.


3) Put the chicken aside and saute the aromatics (onions, ginger, garlic) in the pan until the onions just begin to turn translucent.


4) Deglaze the pan with 1/4 cup of water, soy sauce and vinegar, making sure to scrape all the fond (the yummy bits left sticking to the pan after you sear the chicken) off the bottom, and add the tea.


5) Lower the heat to medium low, pour in the rest of the water, stir in the brown sugar, and add the chicken - SKIN SIDE DOWN - and simmer, partially covered (leaving about a half inch crack to allow steam to escape) for 20 minutes. 

Because heat builds and accumulates during the simmering process, it's a good idea to stir the chicken and check the temp once in a while to make sure it's not getting so hot that the chicken and/or sauce are burning and sticking to the bottom of the pan.


6) After simmering for 20 minutes, flip the chicken over, SKIN SIDE UP (this is important, as you need to give the skin some time to dry out before going under the broiler) and simmer another 20 minutes. At this point, preheat the oven to BROIL.

7) Once the chicken has simmered 40 minutes total, take it off the stove top and place it under the broiler so that the tops of the chicken are 3 to 4 inches from the heat element so the skin can char and crisp, about 2 minutes (check after about a minute and a half, and every 10 seconds thereafter - stuff can go from perfectly charred and caramelized to burnt beyond recognition very quickly under the broiler).


8) Plate with the julienned green onions and ginger sprinkled on top.


I served this with steamed jasmine rice, green beans stir-fried in a sweet, caramelized oyster sauce with some garlic, and baby bok choy stir-fried with oyster sauce, garlic and just a hint of ginger. 

A friend said this bok choy is sexy.
Oddly, I'm inclined to agree...

The kids' favorite veg in the history of ever so far...

The girlchild loved the braising liquid so much she had a second helping of rice just to be able to have more of it.

Me, I ate an extra serving of rice just to be able to use it as a backdrop for that gloriously charred, crisp and slightly sweet and sticky chicken skin...


It doesn't happen as often as I might like, but I love it when I come up with something approachable enough for the kids to love and just different, sophisticated and nuanced enough for me and the Man to delight in.

shinae

Friday, June 24, 2011

Chicken Stock Part Deux...

The other day, I started to write about how to dissect a chicken and make stock, and though I would have liked to complete that post, I am often frustrated by how blogger inserts line breaks with no apparent rhyme or reason, ALL THE TIME. And because I'm in no position to replace this mac should I strangle it to death or throw it out the window in complete frustration, I give up. Fixing the convoluted html is not an option because as soon as you fix it on the back end, blogger goes in and inserts yet more line breaks, with yet more convoluted code, just because it can.
Caldo de Pollo...
So while I'm deciding whether to move to a more predictable platform, if one exists, or to continue here and just figure out a workaround, I often publish my posts short of complete information to spare myself the consequences of First Degree Laptopslaughter. 

But I digress...
... Mashed Potatoes...
Might be hard for some to believe, but there is often heated debate about what makes something a stock and not a broth. Once that's established, there's even hotter debate about the proper way to make it. Roasting bones, fashioning a bouquet garni (booKAY gahrNEE) out of very specific herbs, simmering 'til the chickens come home... And all for good reason within the context of certain food cultures.


But as with any debate that becomes academic, credible arguments are made from many sides. And a cook, especially one who writes about cooking, for practical purposes, has to draw lines in the sand for herself. So all those very detailed, valid and academic arguments included or aside, I tend to make the distinction between stock and broth in two related things: 


1) the addition of salt, and 

2) whether the flavor of the liquid is such that I could serve it as soup or consomme by itself.

And since I use my stock as a base or cooking liquid for soups, sauces and starches from a number of cuisines, I not only never salt my stock, but I barely flavor it with any other elements. And come to think of it, the more I use it, I less I am inclined to add anything but the bones, fat, skin and some flesh. 
... a super simple and lightly buttered risotto...
... even instant tom yum.

All made richer and tastier 
with a little chicken stock.
Sometimes I'll add an onion and maybe a single carrot, because onion is a truly ubiquitous ingredient throughout the world and because a single carrot lends some sweetness without too much distinct fragrance or flavor. In this particular series of pics, also one (and only one - a little goes a long way on my palate) stalk of celery. And that's only because celery gets such little play in my kitchen that a whole bunch, bought for the purpose of making potato salad, will never get used if I don't take every reasonable opportunity to use it. Finally, never any herbs. The simpler my stock, the more adaptable it is, and equally easy for me to use in a pot of pho broth, or tom kha gai, or chili, or risotto, or gravy... I could go on.

And as to the long simmer (3 or 4 hours is often prescribed), which results in a lot of collagen extraction, greater reduction of liquid and higher concentration of flavor, as well as a thicker, more gelatinous substance upon cooling, I prefer a relatively short simmer. No longer than an hour to an hour and fifteen minutes to simmer 8 cups of water down to roughly 6-ish cups of stock. No question you lose some richness, but that kind of richness doesn't work well with everything. And a thinner stock makes for something closer to a one-to-one substitution for water (not exactly, but closer). Not to mention the difference between one hour and three.

One last thing before I post the almost not recipe. I'm not much of an arm twister. I figure if someone wants to make stock, they're going to. But if I can cajole for a moment, I will say that there is a worthwhile difference in depth and complexity of flavor when you substitute some or all of the water in many soup or sauce recipes with stock. And I'll take it a step further to say that there is then another very worthwhile difference between the very simple, pure and unadulterated flavor you get from homemade stock and one that is made to withstand months, years even, on a shelf. So, with no further ado, I release your arm and present you my barely recipe for chicken stock.

CHICKEN STOCK
Makes about 6 cups

You'll need a large stock pot or Dutch oven, and though I'm not big on most single task gadgets, a chinois (sheenWAH) is ideal to strain and filter the stock. If you don't have a chinois, you can also line a strainer or collander with a paper towel and slowly strain the stock, 2 or 3 ladlefuls at a time, replacing the paper towel halfway as it'll get clogged with whatever floaty things result from the simmer.

1) Take the carved up carcass of a whole chicken like I did here, OR 3 or 4 pieces of bone-in thighs (I find the dark meat pieces have more fat and flavor), or even better, chicken backs if you can find them, and place in a stock pot or Dutch oven.
2) Add whatever flavor components work with the style of cooking you like best or cook most. If your preferences are all over the place like mine are, you may find that just a quartered bulb of onion, or nothing at all, is best.
3) Pour in 8 cups cold water and make sure everything is submerged. Cold water is important because hot water can seize up the collagen, which lends the rich flavor and velvety mouthfeel you get from a good stock.
4) Bring the stock to a gentle boil over medium high heat, then reduce to low heat and simmer for about an hour or so. This is so far from rocket science.
5) Strain the stock through a chinois, fine sieve or paper towel lined strainer as described above.
6) Cool the stock to room temperature before refrigerating, about an hour or so, to keep bacteria at bay. The stock will keep in the fridge for about a week, several weeks in the freezer.
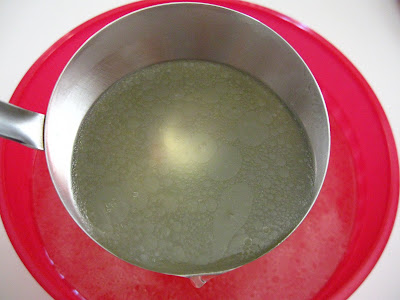
Liquid *YUM*
After several hours in the fridge (7 or 8), the fat will completely solidify into a thin layer atop the stock. You can easily remove this and discard, or, keep to add a little flavor to your sauteed veg and mashed or pan fried potatoes, or even a little extra tenderness and flake to your savory pastry doughs.

So little actual work to make the stock, and so much improvement to so many dishes. I'm probably preaching to the choir, but if you're not a member, I hope you'll join. :)

shinae

Thursday, June 16, 2011

How A Cheap Chick Dissects Cheap Chicken...

I talk all the time about my penchant for frugality. Well, I say *frugal*, you say *cheap* - and I'm ok with that. It's been a loooooong time since I've not looked at the price tag when making a purchase. Whether it's 5, 5 thousand, or 50 thousand dollars, I know exactly how much I pay for everything I buy, and I think that has a lot to do with the resolution I made early on in life to live within my own means so others couldn't, or wouldn't try to, dictate my choices for me.

I'm that gal who knows the per pound price for ginger root when the cashier doesn't know the SKU. When I bought "COFFEE & A PASTRY $2.99" at Whole Foods and they charged me $3.50, I asked why. (Well, "because your 2 dollar *cookie* is not a $2.25 *pastry*" even though they're all in the same display case under the big, fat sign that fails to specify *select* pastries and we all know WF has lawyers to vet that kind of stuff.) If I seemed pennypinching in the inquiry, I accepted the reply without fuss. I try not to shoot messengers.

And no, I'm not one of those misers who separates the plies on my TP to make 2 rolls. I don't embarrass my kids by wearing my clothes from high school that not only look ridiculous but fit so poorly it hurts (which is not to say I don't embarrass them in other ways). I tip 20 percent. I don't keep every last pie tin from every last pie that someone's brought over for dinner in case there's a war and they start rationing out pie tins.

But I do think frugality is a virtue. One that often goes hand in hand with a certain kind of humility and one often lost - sometimes by necessity - to our post industrial, time is money culture. There is no shame in looking for, or recognizing and taking advantage of, value. And in the paradigm of cooking deliciously,  there are few value propositions that exceed the good use of a whole chicken.

When I'm being specially resourceful, one whole, 5 pound bird (often available to me at $1/lb - I don't do the free-range, organic thing, but that's a discussion for another post - and it's not because I don't care about my health or the environment) yields:

- dinner for 4 adults with a variety of light and dark meat

- 6 cups of a light, all-purpose chicken stock to use throughout the week, (If you don't see the value in chicken stock, use it in lieu of water just once in your rice, soup or sauce.

- 2 or 3 meals for our wiener dog Honeydew

- 3 or 4 tablespoons of chicken fat, which is wonderful for adding a little flavor to sauteed vegetables or flaking up a savory empanada pastry, and

- enough chicken skin to fry up a little newspaper coneful of chicharrones to share with the Man over an icy cold lager

All these things will cost different amounts in different places, but the math is easy. A whole chicken, if you're willing to put in the elbow grease, will return your investment at least 7 or 8 fold in the final analysis.

But "What about my time?" you say. What about it? If you wanted quick and easy, you'd be cracking open a Hungry Girl book. She assembles delicious fat free, sugar free, flavor free meals in the time it takes to read one of my long winded posts. She'll save you all kinds of time. But I'm assuming if you've stuck with me this far, you don't think of your time in the kitchen as a sacrifice. Think of it another way: It's probably one of the least expensive and most useful hobbies you'll ever undertake.

Over due practice, you will save time. But assuming you're here because you love good food like I do (or you find the train wreck that is my life too compelling to avert your eyes), I enthusiastically encourage you to pass up that tray of thighs, or drums, or breasts (all of which cost at least double if not more), bag a whole chicken, arm yourself with a sharp knife and a pair of kitchen shears, and dissect the thing. It'll build your character, fatten your wallet, and satisfy your tastebuds.

DISSECTING CHICKEN & MAKING STOCK 101

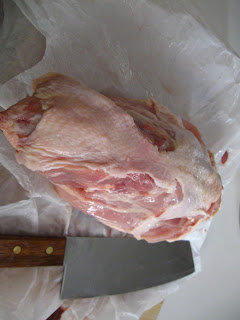
1. Get a sharp knife, a pair of kitchen shears, a large pot, and a cutting board lined with a plastic grocery bag (makes for easier cleanup). Unwrap and drain your chicken in the sink, hind cavity side down, to get rid of all that funky raw chicken juice.
2) With the hind cavity facing you, (don't get all pervy on me now), pull out the neck and giblets. Neck goes into the stock pot. Giblets go in a separate bowl for whatever other purpose (usually a snack for me - I HEART chicken offal like nobody's business.)
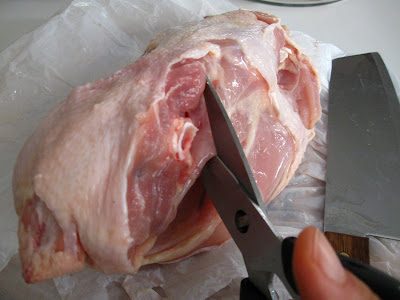
3)With your shears, remove what I call the buttflap of fat from the back sides of the chicken, cutting out a V on both sides like so:
Throw those flaps in the stock pot. FAT IS FLAVOR.


4) Move on to the quarters (the thigh + drum piece). Pull one quarter away from the body and cut through the skin and about 1/4" of flesh. Pull the quarter another couple of inches until you hear a pop. At that point, you should be able to see the joint. Cut through the middle of the joint as you continue to pull on the quarter. Once you're through the joint, you'll be able to cut through the flesh and sever the quarter from the body easily.
Repeat on the other side, and your chicken looks like this:
5) Do the same with the wings:
6) Now, pulling up on the bottom half of the back near the tail (often called the Pope's nose - I don't know why), take your shears and cut through the thin rib bones on both sides.
My left hand was busy taking this pic. Otherwise,
I'd have been doing what I told you to do.
With both sides cut, keep pulling up at the bottom back portion, and you'll see this:
You can snip right through it and throw that piece in the pot too, and your chicken will look like this:
7) Same jobby on the upper back portion and chuck that into the pot as well:
8)  Flip the remaining whole breast and snip away what I call the boobflap fat in a V and put that in the pot too.
Check that trachea
or epiglottis
or whatever that is...


9) Feeling the center for the bone, cut slowly into the flesh on each side, keeping the knife as close to the bone as possible, to release each chicken boob from the breastplate.
Continue cutting slowly, knife against the bone, and remove each breast. Throw what's left into the pot.
!VOILA! You've dissected a whole chicken and should feel bloody righteous about now if you've never done it before.
Dissected chicken - *WOOT!!!*
Back in a bit with the quick stock (hardly) recipe. 11:49 and I am *STARVING*.


shinae


P.S. I do know the difference between *cookies* and *pastries*, but I wouldn't be the first one to call hokey on Whole Foods' pricing/signage practices.


06.24.11 - Chicken stock recipe posted here.