Showing posts with label COOKING BASICS. Show all posts

Wednesday, October 26, 2011

COOKING BASICS - The Equipment...

As you may already know by now, I have a tiny kitchen. And that tiny kitchen requires a certain efficiency when it comes to equipment. I've lived in bigger homes with bigger kitchens, and I've gone through a lot of extraneous equipment, but it just so happens that the current reality of my living space matches with my generally minimalist conclusions about what I need to be content in life in general, and in the kitchen specifically.


Getting ready to post for 30 days straight on cooking basics, I thought it would make sense to first share what equipment I use on a daily basis to produce three varied meals a day (on most days), pulling from a number of cuisines and spanning a wide array of techniques and processes. Truth is, as minimal as my collection might seem to some, a person could do as much with less. But what I've got now makes for a fairly comfortable and convenient setup.


You won't see ubercheap stuff, and you won't see uberexpensive stuff either. A few of my pieces are in the upper midrange as far as cost goes, but they are worth every penny over the long run for their durability and ability to retain and conduct heat. Lest I should be misunderstood, it is totally and completely possible to make really amazing food using the crappiest equipment you can get your hands on, but at this point in my life, I can afford a few conveniences.


There are a handful of other items not pictured or listed that also get some play in my kitchen, but this is the stuff I use most and would recommend to those looking to outfit a new kitchen with everything they need to comfortably produce food from a variety of cuisines. As my brain is generally disjointed this week, I imagine I will have to revisit this post a few times before it's set in stone, but here goes nothing.

(Again, this isn't an exhaustive list of every last item I have and use, and I also have a fair number of wooden, plastic, stainless steel and bamboo spoons and spatulas of varying shapes and sizes as well.)

POTS, PANS & OTHER COOKING VESSELS

- round 5-quart enamel cast iron Dutch oven for braising and deep frying
- 10.25" enamel cast iron skillet for roasting and baking
- stainless steel 8 quart stock pot for making stocks, soups and popcorn
- stainless steel 3.5 quart saucepan for making stocks, soups, sauces, popcorn and rice
- stainless steel 13.5" saute pan for sauteing stovetop, making sauces and also for roasting in the oven
- 6" non-stick frying pan for eggs, pancakes, crepes and other small jobs like that
- 13" oval non-stick pan for bigger eggs, more pancakes, medium sized saute jobs
- 14" wok for stir fry and occasional deep fry and sometimes even boiling stuff if I'm short a pot
- half-size commercial aluminum sheet pan (18" x 13" x 1"), usually lined with aluminum foil, for most of the stuff that gets put in the oven like roasted veg, meatloaf, etc. (not to be confused with a cookie sheet)

GADGETS

I talk all the time about how I'm not very big on kitchen gadgetry, but here are a couple whose function really is difficult to duplicate without great inconvenience.

- small China cap for straining stocks, broths, yogurt
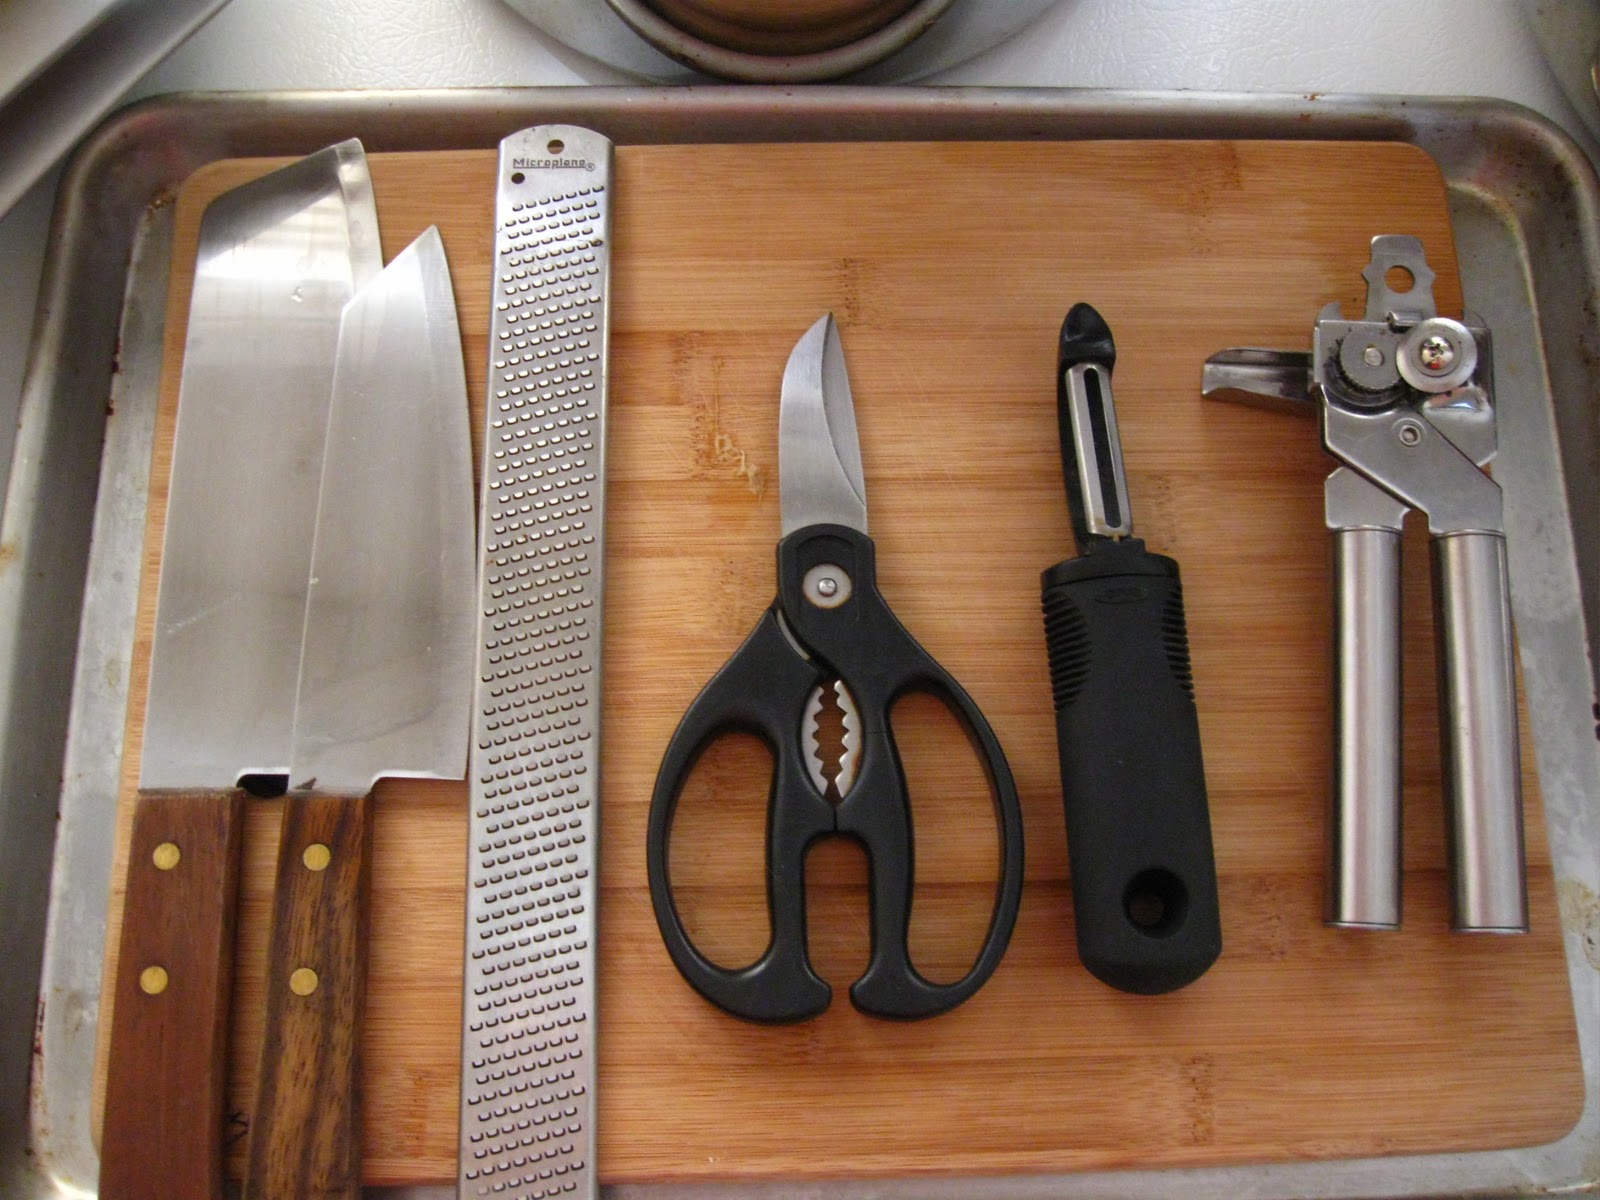
- microplane for grating citrus zest, whole nutmeg and cinnamon bark, and pulverizing small amounts of raw garlic and ginger
- cheese grater (from IKEA - they are the best) for grating cheese  :P
- vegetable peeler
- whisk
- high heat tempered silicone spatula
- measuring cups and spoons

KNIVES AND STUFF

I've already posted about my favorite knives. They really are one of the best kitchen values I've ever found in the history of ever.

I also keep two cutting boards on hand - one for meat and veg, one for fruit. It is near impossible to completely remove the smell of onions and garlic from a cutting board if you don't have a dishwasher (which I don't), and gawd do I hate tasting onions and garlic on my fruit...

SMALL ELECTRICAL APPLIANCES

- blender for salsas, smoothies, shakes, and kimchi of all things...
- hand mixer for when my kids want cheater cakes or brownies, fresh whipped cream, or when I want to whip up my mashed potatoes

And a food processor if you're feeling splurgy. I don't use my Cuisinart all that often, but it is incredibly handy on the occasions and for the purposes for which I do use it such as grinding meat, making pastry dough, making pasta and the occasional hummus and that's pretty much it. Now that I put it that way, you might wanna think twice about forking out the dough for a food processor if you're just starting out...

I think that covers it, and can I tell you how daunted I am by the idea of coming up with sensible, relevant, and logically progressing posts on the basics of cooking for 30 days straight?

A lot.

Until maƱana,

shinae

P.S.

ADDENDA TO THE LIST

10.26.11 Jan reminded me there is no colander in this post. OF COURSE I USE A COLANDER. ALL THE TIME. My brain is for shit right now. But then I already told you that. I'm sure I'll be back with more...

Oh, and they're pictured, but I forgot to mention STAINLESS STEEL MIXING BOWLS. You know, for MIXING THINGS.

Monday, October 10, 2011

COOKING BASICS - How To Poach An Egg In Murky Water That You've Just Boiled Your Ramen In...

A while back, my friend Ikuyo suggested I post about poaching eggs. Given that poached egg with ramen is my go-to homecooked fast food meal, it makes perfect sense that I would.

While poaching eggs is really not that difficult a thing to do, I can see why the process is a challenging one for those who don't do it often. There are lots of dicey and iffy moments during that 3 or 4 minutes (depending on the size) during which the egg is reaching the right poachedness that make you think it's not going to make it. So you mess with it a little too much, lose even more of the white than you would normally lose, perhaps jiggle it before it's sufficiently set and pop the yolk, and when you do that, just forget it all and eat a bag of chips or something because who wants a well done poached egg???

This poached egg is not well done. :)

This reminds me of a conversation I had with the Boy yesterday about how sometimes, good cooking is as much about knowing when to be still as active. Poaching an egg requires:

- faith,
- patience,
- willingness to sacrifice, and
- restraint.

Faith as the whites are flailing in slow motion that they will come together at some point; patience to wait until they do just that; willingness to sacrifice the inevitable loss of white (and it looks like a lot, but it's not that much, really); and the restraint required first not to boil the water too, too hot, and second not to touch the egg until it's good and ready.

HOW TO POACH AN EGG

A pot with a thicker ply of insulation on the bottom is best for poaching eggs as thin bottomed pots put the eggs in closer contact with too much direct heat, resulting in the egg sticking to the bottom and being much more likely to break when you try to remove it. How thick do I mean by thick? At least a quarter of an inch. How thin do I mean by thin? I mean those really inexpensive stainless steel or nonstick pans where the bottom ply is an eighth of an inch or so. The kind that are so thin and light you can twirlspin them by the handle.

Sorry the water isn't clear in these pics. I poached the eggs for ramen after boiling my ramen noodles in the water first. This, by the way, is my most common use for poached eggs.

Some people recommend using vinegar or some other acid to help the protein seize/solidify faster. I tried it once and didn't care for the very subtle difference in the texture of the egg that I can't articulate at the moment.

1) Fill your pot with about 4 inches of water and bring up to a gently rolling boil over slightly higher than medium heat. The gently rolling part is important because if it's so hot that it's spit/splatter or even rolling boiling, the initial disturbance to the egg hinders proper poaching.

2) Crack the eggshell, and holding it as close to the water as you can without hurting yourself, gently open the shell and release the egg into the water. If you don't have asbestos hands like me and are generally very sensitive to heat, you can crack the egg into a bowl and then gently pour the egg into the water from a safer distance for your hands.

Those pesky flailing whites that make you mistakenly
think your poached eggs are going to hell...

3) Don't touch it. At least not for a good two minutes depending on the size of the egg. The ones pictured here were jumbos straight out of the fridge and they took about 4 minutes total cooking time. During this cooktime, some of the white will separate from the rest of the egg. This is to be expected.


4) After 2 or 3 minutes (again depending on the size and temperature of the egg), when it appears at first glance that all of the white has turned opaque, take a spoon or spatula and stir very gently in a clockwise circular motion along the outer edges of the pot, using the actual pot as a guide for your spoon or spatula, and being careful not to disturb the egg(s).

If the egg is done, it will usually separate from the bottom of the pot by itself, and when you lift it out of the water, you will see that while all the white is opaque and cooked through, the yolk is still runny and jiggly underneath.


Sometimes, the egg gets stuck to the bottom of the pot. In which case, you take a spatula and swiftly scrape it off the bottom of the pan using one quick motion, holding the scraping edge of the spatula down along the bottom surface. This makes sure you get as much of the egg as possible while not disturbing the yolk, which should be closer to the top than the bottom.


If you wanna get all chi-chi-foo-foo about it, you can trim the thinner outer edges of the white, but I leave them on because I figures that's just more food for me. :)

shinae